Maintaining a clean evaporator coil is essential for the efficiency and longevity of your HVAC system. Dust and debris buildup in this area can reduce airflow, decrease energy efficiency, and even lead to costly repairs. Knowing how to check for dust near the evaporator coil can help you catch problems early and keep your indoor air quality high. This guide provides clear, practical steps and tips for inspecting and addressing dust accumulation around your coil, whether you’re a homeowner or a facility manager.
Before diving into the inspection process, it’s important to understand why dust near the evaporator coil is a concern. Accumulated particles can act as an insulator, preventing the coil from absorbing heat effectively. This can cause your system to work harder, increase energy bills, and potentially shorten the lifespan of your equipment. For those interested in broader duct maintenance, you might also want to learn how to clean insulated ductwork safely for a more comprehensive approach to air quality.
Why Inspecting for Dust Around the Coil Matters
Dust accumulation near the evaporator coil isn’t just a cosmetic issue. Over time, even a thin layer of dust can create a barrier that limits heat exchange. This can result in:
- Reduced cooling efficiency – The system has to work harder to cool your space.
- Higher energy consumption – More energy is used to achieve the same level of comfort.
- Potential coil freezing – Restricted airflow can cause the coil to freeze, leading to water leaks and further damage.
- Poor indoor air quality – Dust and allergens may circulate throughout your home or office.
Regularly checking for dust near the evaporator coil helps you avoid these issues and keeps your HVAC system running smoothly. If you’re interested in advanced cleaning methods, understanding the negative air pressure method can further enhance your maintenance routine.
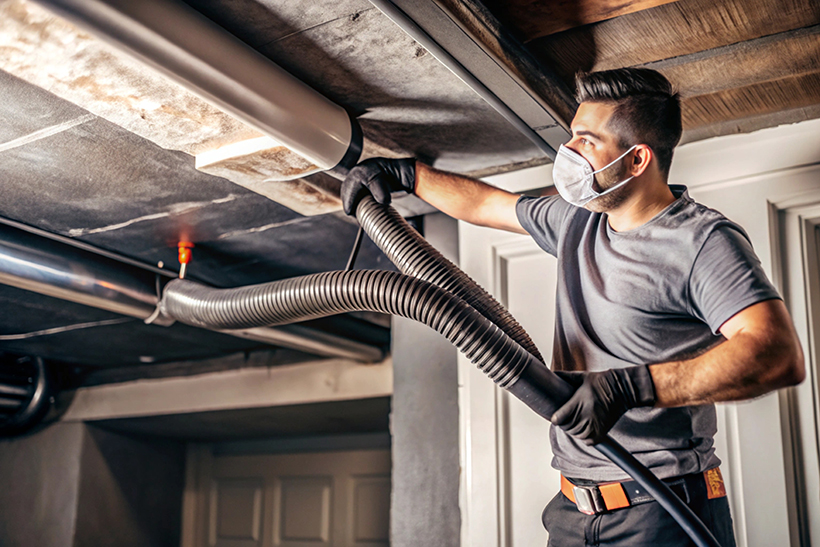
Tools and Safety Precautions for Inspecting the Coil Area
Before you begin, gather the necessary tools and take safety precautions:
- Flashlight or headlamp for visibility
- Screwdriver (to open access panels)
- Protective gloves and mask (to avoid inhaling dust)
- Soft brush or vacuum with a hose attachment (for light cleaning, if needed)
Always turn off the power to your HVAC system at the breaker before opening any panels. This ensures your safety and prevents accidental damage to the equipment.
Step-by-Step Guide: Inspecting for Dust Near Your Evaporator Coil
Follow these steps to check for dust and debris around the coil:
- Locate the evaporator coil. It’s typically found inside the air handler or furnace, often above or below the blower fan.
- Remove the access panel. Use a screwdriver to carefully open the panel. Set screws aside in a safe place.
- Visually inspect the area. Shine your flashlight around the coil, looking for visible dust, dirt, or debris buildup on the coil fins and nearby surfaces.
- Check for airflow obstructions. Look for any blockages, such as insulation, pet hair, or other debris that could restrict airflow.
- Assess the coil’s condition. If you notice a thick layer of dust or matted debris, your coil may require professional cleaning.

Common Signs of Dust Buildup Near the Coil
Even if you don’t open your HVAC unit regularly, there are some telltale signs that dust may be accumulating near the evaporator coil:
- Reduced airflow from vents
- Unusual odors when the system runs
- Visible dust around air registers or on the coil itself
- Increased allergy symptoms or respiratory irritation indoors
- Higher energy bills without a clear cause
If you notice any of these symptoms, it’s a good idea to perform a visual inspection. Persistent issues may indicate a need for deeper cleaning or professional service. For more on health impacts, see the article on symptoms of sick building syndrome from ducts.
How to Minimize Dust Accumulation Around the Coil
Prevention is key to keeping your coil area dust-free. Here are some practical strategies:
- Change air filters regularly. Use high-quality filters and replace them as recommended by the manufacturer.
- Seal duct leaks. Leaky ducts can draw in dust from attics, crawl spaces, or basements.
- Keep supply and return vents clean. Vacuum and dust vents as part of your regular cleaning routine.
- Schedule professional duct cleaning. For a thorough job, consider hiring a certified technician or learn how to clean heating and air conditioning ducts yourself with proper guidance.
- Install UV lights. These can help reduce microbial growth on the coil. For more, read about the role of UV lights in duct cleanliness.
When to Call a Professional for Coil Cleaning
While routine inspections and light cleaning can be handled by most homeowners, there are situations where professional help is necessary:
- Heavy dust or mold buildup on the coil
- Persistent odors or visible biological growth
- Difficulty accessing the coil safely
- Recurring airflow or cooling issues despite regular maintenance
Certified HVAC technicians have the tools and expertise to clean coils thoroughly without damaging delicate fins or electrical components. They can also identify underlying issues such as refrigerant leaks or failing parts.
Maintenance Tips for Cleaner Air and Efficient Cooling
Keeping the area around your evaporator coil clean isn’t a one-time task. Incorporate these habits into your maintenance routine:
- Inspect the coil area at least twice a year, ideally before cooling and heating seasons.
- Replace filters every 1–3 months, or more often if you have pets or allergies.
- Keep the area around your air handler or furnace free of clutter and dust.
- Schedule annual HVAC tune-ups to catch issues early.
- Consider using a HEPA air scrubber to reduce airborne particles in your home.
Frequently Asked Questions
How often should I check for dust near my evaporator coil?
It’s best to inspect the coil area at least twice a year—once before the cooling season and once before heating begins. If you have pets, allergies, or live in a dusty environment, more frequent checks may be beneficial.
Can I clean the evaporator coil myself?
Light dust can often be removed with a soft brush or vacuum, but heavy buildup or mold should be addressed by a professional. Always turn off power to the unit before attempting any cleaning.
What are the risks of ignoring dust buildup near the coil?
Neglecting dust accumulation can reduce system efficiency, increase energy costs, lead to coil freezing, and degrade indoor air quality. Over time, it may also cause expensive repairs or shorten the lifespan of your HVAC system.