Keeping your HVAC system in top shape starts with regular maintenance, and one of the most important tasks is learning how to clean an air handler unit properly. A clean air handler ensures better indoor air quality, improved energy efficiency, and a longer lifespan for your heating and cooling equipment. Whether you’re a homeowner or a facility manager, understanding the right approach to this essential job can help you avoid costly repairs and maintain a healthy environment.
This guide walks you through each step, from preparation to final inspection, using professional methods and practical tips. If you’re interested in related maintenance topics, you might also find value in our article on how to clean insulated ductwork safely, which covers best practices for ductwork care.

Why Regular Air Handler Cleaning Matters
Over time, dust, debris, and biological contaminants can accumulate inside your air handler. This buildup can restrict airflow, reduce efficiency, and introduce allergens or mold spores into your living space. By following a routine cleaning schedule, you can:
- Improve indoor air quality by removing dust and contaminants
- Enhance system performance and reduce energy costs
- Prevent premature wear and extend equipment life
- Reduce the risk of mold growth and unpleasant odors
For those with pets or allergies, maintaining clean air ducts and handlers is especially important. You can learn more about the long term benefits of clean air ducts for homeowners in our detailed guide.
Essential Tools and Safety Precautions
Before starting, gather the necessary tools and safety gear. Here’s what you’ll need for a thorough job:
- Screwdrivers (Phillips and flathead)
- Vacuum with HEPA filter
- Soft-bristle brush
- Microfiber cloths
- Mild detergent or coil cleaner
- Protective gloves and safety glasses
- Face mask or respirator (especially if mold is present)
Always turn off the HVAC system at the breaker panel before beginning any cleaning. This prevents accidental startup and protects you from electrical hazards. If you suspect mold or heavy contamination, consider using a HEPA air scrubber for added safety.
Step-by-Step Process for Cleaning Your Air Handler
Following a systematic approach ensures you don’t miss any critical components. Here’s how professionals tackle the job:
1. Power Down and Access the Unit
Shut off power to the air handler at the breaker. Remove the access panel using your screwdriver. Set aside screws in a safe place for reassembly.
2. Inspect for Visible Contamination
Look for dust, dirt, mold, or water stains. Pay close attention to the blower compartment, evaporator coil, and drain pan. If you notice significant mold growth, it may be best to consult a certified HVAC technician or refer to a guide to antimicrobial duct treatment for advanced cleaning solutions.
3. Clean or Replace the Air Filter
Remove the air filter. If it’s reusable, wash it with mild detergent and let it dry completely before reinstalling. If it’s disposable, replace it with a new one. Clean filters are vital for maintaining airflow and system efficiency.
4. Vacuum and Brush Interior Surfaces
Use a vacuum with a HEPA filter to remove loose dust and debris from all accessible surfaces. Gently brush stubborn dirt from the blower fan, coil fins, and compartment walls. Avoid bending or damaging delicate fins on the evaporator coil.
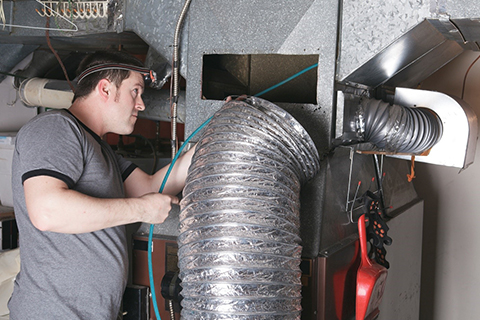
5. Clean the Evaporator Coil and Drain Pan
Spray a coil cleaner or mild detergent onto the evaporator coil. Allow it to sit for the recommended time, then gently wipe with a microfiber cloth. Rinse if necessary, following the product instructions. Clean the drain pan with soap and water to prevent mold and algae buildup. Ensure the drain line is clear and free-flowing.
6. Wipe Down and Reassemble
Use a damp cloth to wipe down all interior surfaces, removing any remaining dust or cleaner residue. Allow all components to dry thoroughly before reassembling the access panel and restoring power to the unit.
Tips for Maintaining a Cleaner Air Handler
Routine maintenance can minimize the need for deep cleaning and keep your system running smoothly. Here are some helpful tips:
- Check and replace air filters every 1–3 months
- Keep the area around the air handler free of clutter and dust
- Schedule professional HVAC inspections annually
- Monitor for signs of moisture, leaks, or unusual odors
- Consider using a HEPA air scrubber during cleaning or renovations for added protection
If you’re unsure about tackling this task yourself, or want to compare DIY vs. professional results, this comprehensive guide to cleaning your air ducts yourself offers valuable insights and safety considerations.
Common Mistakes to Avoid
Even with the best intentions, some errors can compromise your results or damage your system. Avoid these pitfalls:
- Forgetting to turn off power before starting
- Using harsh chemicals that can corrode metal parts
- Neglecting to clean the drain pan and line
- Reinstalling a wet or dirty air filter
- Over-tightening screws when reassembling panels
When to Call a Professional
While many homeowners can handle basic cleaning, some situations require expert attention. Contact a licensed HVAC technician if you notice:
- Persistent mold or mildew inside the unit
- Unusual noises or vibrations during operation
- Water leaks or standing water in the drain pan
- Electrical issues or burnt wiring
- Extensive buildup that can’t be removed with standard cleaning
Professionals have specialized tools and training to handle complex issues, ensuring your system is safe and efficient. If you manage a commercial property, you may also want to review the differences in how to clean commercial vs residential ducts for tailored advice.
Frequently Asked Questions
How often should I clean my air handler unit?
Most experts recommend a thorough cleaning at least once a year, typically before the start of the cooling or heating season. However, homes with pets, smokers, or allergy sufferers may benefit from more frequent maintenance.
Can I use household cleaners on my air handler components?
It’s best to use products specifically designed for HVAC systems, such as coil cleaners or mild detergents. Harsh chemicals can damage sensitive parts and leave harmful residues.
What are the signs that my air handler needs cleaning?
Common indicators include reduced airflow, increased dust in the home, musty odors, visible dirt or mold inside the unit, and higher energy bills. Regular inspections can help you spot these issues early.
Conclusion
Mastering the process of how to clean an air handler unit can make a noticeable difference in your home’s comfort and air quality. With the right tools, safety precautions, and a systematic approach, you can achieve professional-level results and extend the life of your HVAC system. For more tips on maintaining a healthy indoor environment, explore our resources on duct cleaning frequency and antimicrobial treatments.