Understanding what’s inside your air ducts is essential for maintaining a healthy and efficient HVAC system. One of the most reliable ways to assess ductwork condition is through a detailed camera inspection. These inspections generate comprehensive reports, which can sometimes be confusing if you’re not familiar with the process or terminology. In this guide, we’ll break down how these reports are created, what information they include, and how to interpret the findings for better air quality and system performance.
If you’re interested in learning more about the process itself, the duct camera inspection explained article provides a thorough overview of the technology and its applications.

What Is a Duct Camera Inspection Report?
A duct camera inspection report is a document generated after a professional uses a specialized camera to visually inspect the inside of your air ducts. The camera captures real-time footage or images, allowing technicians to identify blockages, dust buildup, mold, leaks, and other issues that could impact air quality or HVAC efficiency. The resulting report provides a step-by-step summary of findings, often including annotated images, descriptions, and recommendations for action.
Step-by-Step Breakdown of the Inspection Process
To fully understand the report, it helps to know how the inspection is conducted. Here’s how the process typically unfolds:
- Preparation: The technician prepares the inspection area, ensuring access points to the ductwork are clear and safe.
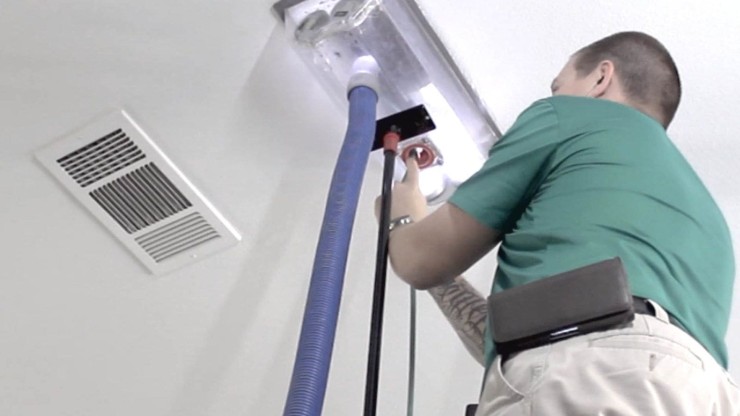
- Camera Insertion: A high-resolution camera, often mounted on a flexible rod, is inserted into the duct system. This camera transmits live video to a monitor.
- Systematic Scanning: The technician carefully navigates the camera through the ducts, documenting areas of concern such as debris, microbial growth, or physical damage.
- Recording and Annotation: Images and video clips are recorded. Technicians may annotate these visuals to highlight specific issues.
- Report Compilation: All findings are compiled into a structured report, which is then shared with the property owner or manager.
Key Sections Found in a Typical Report
While the format may vary between service providers, most reports contain several common sections. Here’s what you can expect:
- Introduction and Summary: An overview of the inspection’s purpose, date, and scope.
- Visual Evidence: Still images and video screenshots from inside the ducts, often with notes or arrows highlighting problem areas.
- Findings: Detailed descriptions of what was observed, such as dust accumulation, mold, obstructions, or damaged insulation.
- Recommendations: Actionable advice, which may include cleaning, repairs, sealing, or further testing.
- Conclusion: A summary of the overall duct condition and next steps.
How to Read and Interpret Your Duct Inspection Report
When reviewing your report, focus on the following elements to get the most value:
- Severity of Issues: Pay attention to any urgent problems flagged by the technician, such as mold or major blockages.
- Location Details: Reports often specify where within the duct system each issue was found, helping you or your contractor target repairs.
- Supporting Images: Use the provided visuals to better understand the written findings. Images make it easier to see the extent of dust, debris, or damage.
- Recommended Actions: Take note of any cleaning, sealing, or replacement suggestions. These are prioritized based on the impact on air quality and system performance.
If you want to dive deeper into the technology and methodology, the HVAC duct camera inspection guide offers a comprehensive look at inspection tools and best practices.

Benefits of a Detailed Duct Camera Assessment
A thorough inspection and report provide several advantages for property owners and facility managers:
- Transparency: Visual evidence builds trust in the findings and recommendations.
- Preventive Maintenance: Early detection of issues can prevent costly repairs and improve system longevity.
- Improved Air Quality: Identifying and addressing contaminants helps maintain a healthier indoor environment.
- Energy Efficiency: Clean and intact ducts reduce strain on your HVAC system, lowering energy bills.
- Documentation: Reports serve as a record for future maintenance, warranty claims, or property sales.
Common Issues Identified During Camera Inspections
Some of the most frequent findings in ductwork include:
- Dust and Debris: Accumulations that can restrict airflow and degrade air quality.
- Mold Growth: Moisture issues leading to microbial contamination.
- Leaks and Gaps: Damaged or disconnected sections that waste energy.
- Obstructions: Foreign objects or collapsed duct sections.
- Damaged Insulation: Exposed or deteriorated insulation affecting efficiency.
For more on maintaining healthy ducts and improving indoor air, you might find the air filters and dust reduction guide helpful.
What to Do After Receiving Your Inspection Report
Once you’ve reviewed your report, consider the following steps:
- Consult with Your Technician: Ask questions about any unclear findings or recommendations.
- Prioritize Actions: Address urgent issues first, such as mold or severe blockages.
- Schedule Maintenance: Arrange for cleaning, repairs, or sealing as advised.
- Keep Records: Save your report for future reference and as proof of maintenance.
If you’re seeking more technical details or want to see sample reports, this professional camera duct inspection resource offers additional insights and examples.
FAQ: Duct Camera Inspection Reports
What types of problems can a duct camera inspection reveal?
These inspections can uncover a range of issues, including dust buildup, mold, blockages, leaks, disconnected sections, and damaged insulation. The camera provides a clear view of areas that are otherwise inaccessible, making it easier to spot problems early.
How often should I have my ducts inspected with a camera?
For most homes and businesses, a camera inspection every 3–5 years is recommended, or sooner if you notice signs of poor air quality, unusual odors, or reduced HVAC efficiency. Properties with recent renovations, water damage, or pest issues may require more frequent checks.
Is a duct camera inspection report necessary before cleaning or repairs?
While not always mandatory, having a detailed report ensures that cleaning or repairs are targeted and effective. It helps technicians identify the exact locations and types of problems, reducing unnecessary work and costs.
Conclusion: Making the Most of Your Inspection Results
A well-prepared duct camera inspection report is a valuable tool for maintaining your HVAC system and indoor air quality. By understanding the process, knowing what to look for in the findings, and acting on recommendations, you can keep your ducts in optimal condition and avoid future problems. For those new to the concept, the what is duct camera inspection resource offers a beginner-friendly introduction to the topic.