Installing a rotary brush system is a practical solution for thorough duct cleaning, HVAC maintenance, and other industrial cleaning applications. Whether you’re a professional technician or a facility manager looking to improve air quality and equipment efficiency, understanding the correct installation process is essential. This guide covers the tools, preparation, and step-by-step instructions needed for a successful setup, along with tips for safety and ongoing maintenance.
Before diving into the installation process, it’s helpful to familiarize yourself with the rotary brush system components that make up your kit. Knowing the function of each part will streamline assembly and ensure you get the best performance from your equipment.
Why Choose a Rotary Brush System for Cleaning?
Rotary brush systems are widely used for cleaning air ducts, dryer vents, and industrial pipelines. Their rotating action dislodges dust, debris, and contaminants that traditional vacuums or manual brushes often miss. This leads to improved air quality, reduced fire hazards, and more efficient HVAC operation. For businesses, the benefits of these systems can be substantial, as outlined in key rotary brush system benefits for commercial environments.
Essential Tools and Preparation for Rotary Brush System Installation
Before beginning the installation, gather all necessary tools and review your system’s manual. Most rotary brush kits include:
- Flexible rods or shafts
- Rotary brush heads (various sizes)
- Drive unit (electric or pneumatic motor)
- Adapters and couplings
- Protective gear (goggles, gloves, mask)
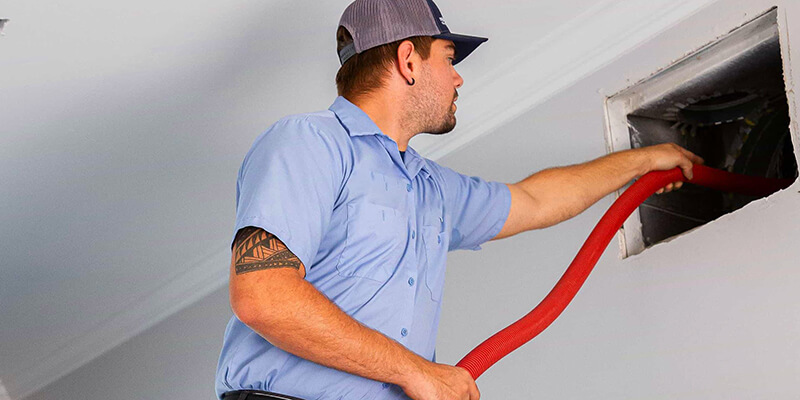
Inspect the area to be cleaned, checking for access points, bends, or blockages. Clear the workspace of obstructions and ensure you have adequate lighting. If you’re cleaning HVAC ducts or dryer vents, turn off the system and disconnect power for safety.
For a deeper understanding of system versatility, explore rotary brush system applications across different industries.
Step-by-Step Guide to Setting Up Your Rotary Brush System
Follow these steps for a smooth and effective installation:
1. Assemble the Flexible Rods and Brush Head
Start by selecting the appropriate brush head size for your duct or vent. Attach it securely to the first flexible rod. Most rods are designed to connect end-to-end, allowing you to extend the reach as needed. Ensure all connections are tight to prevent detachment during operation.
2. Connect the Drive Unit
Attach the end of the rod assembly to your drive unit. This could be a drill, electric motor, or pneumatic tool, depending on your kit. Make sure the connection is secure and test the rotation at low speed to confirm smooth operation. If your system includes a speed control, start at the lowest setting to avoid damaging the brush or ductwork.
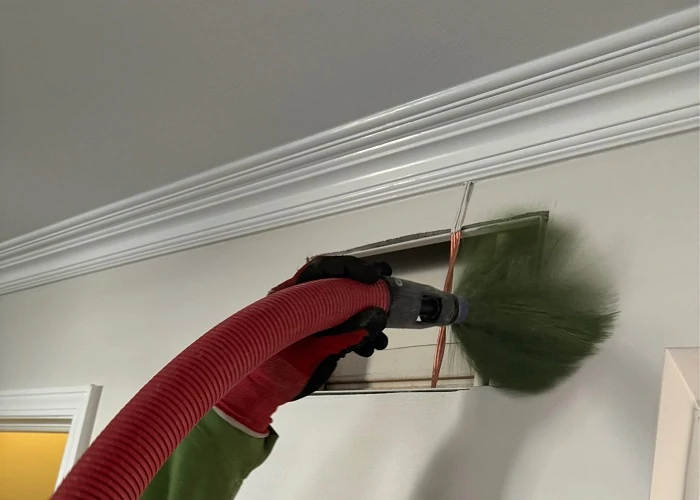
3. Insert the Brush into the Duct or Vent
Carefully feed the brush head into the opening. Guide the rods gently, especially around bends or elbows. Turn on the drive unit and slowly advance the brush, allowing the rotating action to dislodge debris. Move the brush back and forth to ensure comprehensive cleaning. For longer ducts, add additional rod sections as you progress.
4. Monitor Progress and Remove Debris
As you clean, periodically withdraw the brush to check for obstructions or excessive buildup. Remove any large debris manually if needed. For best results, use a vacuum attachment or collection bag to capture dislodged dust and particles. This prevents recontamination of the cleaned area.
5. Disassemble and Inspect Equipment
Once cleaning is complete, turn off the drive unit and carefully remove the rods and brush. Inspect all components for wear or damage. Clean the brush heads and rods according to manufacturer instructions. Proper maintenance will extend the life of your equipment—see the rotary brush maintenance guide for detailed care tips.
Common Mistakes to Avoid During Setup
Proper rotary brush system installation requires attention to detail. Avoid these frequent errors:
- Using the wrong brush size for the duct or vent
- Failing to secure rod and brush connections
- Operating at excessive speeds, which can damage ducts or brushes
- Skipping safety gear, leading to exposure to dust or debris
- Neglecting to check for blockages before starting
Taking the time to follow each step carefully will ensure a safe and effective cleaning process.
Maintenance Tips for Long-Term Performance
After installation and use, regular maintenance is crucial for keeping your rotary brush system in top condition. Clean all parts after each use, inspect for wear, and replace any damaged components promptly. For additional advice, refer to the maintenance tips for brush cutters, which offer helpful insights applicable to rotary brush systems as well.
Store your equipment in a dry, secure location to prevent rust or accidental damage. Periodically lubricate moving parts if recommended by the manufacturer. Keeping a maintenance log can help track usage and anticipate when replacements or repairs are needed.
Advanced Cleaning Solutions and Upgrades
For those seeking enhanced cleaning capabilities, advanced rotary brush cleaning systems offer features such as variable speed controls, interchangeable brush heads, and integrated vacuum systems. These upgrades can improve efficiency and adaptability for a wider range of applications.
When considering an upgrade, evaluate your cleaning needs, duct sizes, and frequency of use. Investing in a high-quality system can deliver better results and reduce maintenance time in the long run.
Frequently Asked Questions
How often should I clean ducts with a rotary brush system?
For residential HVAC systems, cleaning every 2–3 years is generally recommended. Commercial or industrial environments may require more frequent cleaning, depending on usage and air quality requirements.
Can I use a rotary brush system on flexible ducts?
Yes, but use caution. Choose a brush head designed for flexible ducts and operate at low speeds to avoid damaging the ductwork. Always check manufacturer guidelines for compatibility.
What safety precautions should I take during installation?
Wear protective goggles, gloves, and a dust mask. Ensure the HVAC or vent system is powered off before starting. Work slowly and check connections regularly to prevent accidents or equipment damage.
Conclusion
Installing a rotary brush system is a straightforward process that delivers significant benefits for duct and vent cleaning. By following the steps outlined above and maintaining your equipment, you’ll achieve cleaner air, improved system efficiency, and a safer environment. For further details on system components, applications, or maintenance, explore the linked resources throughout this article.