Maintaining clean air in your home is essential for both comfort and health. Whether you use a ductless mini split system or a traditional forced-air system with ductwork, regular cleaning ensures optimal performance and indoor air quality. However, the process and challenges of cleaning a mini split head compared to standard ducts are quite different. This article explores the practical steps, tools, and considerations for each method, helping you understand the best approach for your HVAC setup. If you’re also interested in related maintenance topics, you might find our guide on how to remove scale from metal ducts helpful.

Understanding the Differences Between Mini Split Heads and Ducted Systems
Before diving into the cleaning process, it’s important to understand the key differences between ductless mini split heads and traditional ductwork. A mini split system consists of an outdoor compressor and one or more indoor air handling units (the “heads”). These heads are mounted on walls or ceilings and deliver conditioned air directly into the room, eliminating the need for extensive ductwork.
In contrast, standard HVAC systems use a network of ducts to distribute air throughout the home. Over time, both mini split heads and ducts can accumulate dust, debris, mold, and allergens, but the way these contaminants build up and the cleaning methods required are not the same.
Why Regular Cleaning Matters for Both Systems
Neglecting regular cleaning can lead to reduced efficiency, higher energy bills, and poor indoor air quality. For mini splits, dirty heads can restrict airflow and harbor mold, while in ducted systems, dust and debris can circulate throughout the house. Understanding how to clean a mini split head vs ducts helps prevent these issues and extends the life of your equipment.
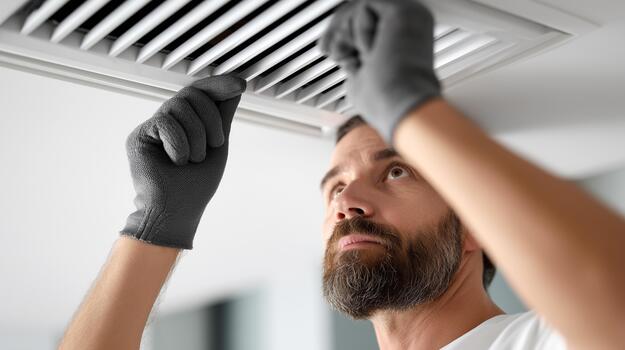
Step-by-Step: Cleaning a Mini Split Head
Cleaning a mini split head is a hands-on process that can often be handled by homeowners with basic tools and care. Here’s how to approach it:
- Turn Off the Power: Always switch off the unit and disconnect it from power before starting any cleaning.
- Open the Front Panel: Gently lift or slide open the front cover to access the filters and coils.
- Remove and Clean Filters: Take out the air filters. Rinse them under lukewarm water and let them dry completely before reinserting. For stubborn dirt, use a mild detergent.
- Clean the Evaporator Coils: Use a soft brush or a coil cleaning spray designed for mini splits. Avoid using harsh chemicals or excessive water, as this can damage internal components.
- Wipe Down the Exterior and Louvers: Use a damp cloth to clean the outer casing and the adjustable louvers.
- Check for Mold or Mildew: If you notice any signs of mold, consider using an anti-microbial spray or consult a professional for deep cleaning.
- Reassemble and Test: Once everything is dry, reassemble the unit and turn it back on to ensure proper operation.
For more detailed cleaning, such as flushing the drain pan or accessing the blower wheel, professional service may be recommended.
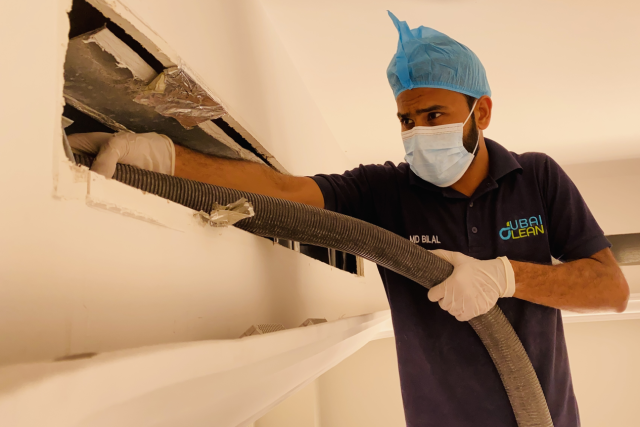
How to Clean Standard Ductwork
Unlike mini split heads, cleaning ductwork is a more involved process that usually requires specialized equipment. Here’s an overview of the typical steps:
- Inspect the Ducts: Remove vent covers and use a flashlight to check for visible dust, debris, or mold.
- Vacuum Accessible Areas: Use a vacuum with a long hose and HEPA filter to remove dust from the openings. Be careful not to damage duct insulation or flexible ducts.
- Brush and Agitate: For deeper cleaning, professionals use rotary brushes or compressed air tools to dislodge debris inside the ducts.
- Negative Air Pressure: Commercial duct cleaning often involves attaching a large vacuum to the duct system, creating negative pressure to pull out loosened contaminants.
- Clean Registers and Grilles: Wash vent covers and grilles with soap and water before reinstalling.
- Address Mold or Odors: If mold is present, specialized cleaning agents or even duct replacement may be necessary.
DIY duct cleaning is limited to what you can reach. For a thorough job, hiring a certified professional is recommended. For a detailed look at the process, see this step-by-step guide to professional duct cleaning.
Comparing Cleaning Frequency and Challenges
When considering how to clean a mini split head vs ducts, it’s important to note the recommended cleaning frequency and unique challenges for each:
- Mini Split Heads: Filters should be cleaned every 2–4 weeks, with deeper cleaning every 6–12 months. Mold and mildew can be a concern, especially in humid climates.
- Ducted Systems: Ducts typically require professional cleaning every 3–5 years, or more often if you notice dust buildup, odors, or allergy symptoms. Accessing the full duct system can be difficult without specialized tools.
Mini splits are easier for homeowners to maintain regularly, while ducted systems benefit from periodic professional attention.
Tools and Products for Effective Cleaning
Having the right tools makes a significant difference in cleaning results:
- For mini split heads: soft brushes, coil cleaning sprays, microfiber cloths, and mild detergents.
- For ductwork: HEPA vacuums, rotary brushes, compressed air tools, and, for professionals, negative air machines.
- Consider using a HEPA air scrubber during and after cleaning to capture airborne particles and improve indoor air quality.
Always follow manufacturer recommendations for cleaning products and procedures to avoid damaging your HVAC system.
Signs Your System Needs Cleaning
Recognizing when it’s time to clean your mini split or ducts can help prevent bigger problems. Watch for these signs:
- Visible dust or debris on vents or mini split heads
- Reduced airflow or uneven cooling/heating
- Unpleasant odors when the system runs
- Increased allergy or respiratory symptoms
- Visible mold or mildew inside the unit or ducts
If you notice any of these, schedule a cleaning or consult a professional. For more on related topics, our article on signs of moisture in air ducts can help you identify potential issues early.
Professional vs DIY: When to Call an Expert
While basic cleaning of mini split filters and accessible duct openings can be done by most homeowners, certain situations require professional help:
- Extensive mold or mildew growth
- Persistent odors that don’t resolve with cleaning
- Visible debris deep inside ducts or blower assemblies
- After renovations or construction projects
Certified technicians have the equipment and expertise to clean thoroughly and safely, ensuring your system runs efficiently and your indoor air stays healthy.
Frequently Asked Questions
How often should I clean my mini split head compared to ductwork?
Mini split filters should be cleaned every 2–4 weeks, with a deeper cleaning of the coils and internal parts every 6–12 months. Ductwork generally requires professional cleaning every 3–5 years, or sooner if you notice dust, odors, or allergy symptoms.
Can I use the same cleaning products for both mini split heads and ducts?
No, it’s best to use products specifically designed for each system. Mini split heads require gentle, non-corrosive cleaners, while ductwork may need stronger cleaning agents and specialized equipment. Always check manufacturer guidelines before using any product.
Is professional cleaning necessary for both systems?
Basic maintenance like filter cleaning can be done at home for mini splits, but professional service is recommended for deep cleaning, especially if there’s mold or persistent odors. Duct cleaning is best handled by professionals due to the complexity and need for specialized tools.