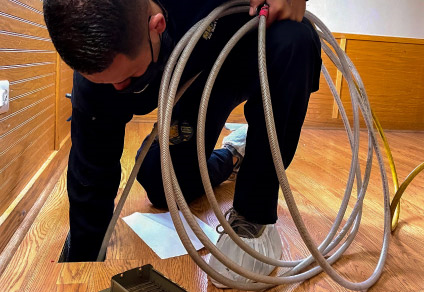
Keeping your home’s air ducts clean can make a significant difference in indoor air quality, energy efficiency, and the overall health of your HVAC system. Many homeowners wonder if it’s possible to tackle this job on their own. The good news is that with the right tools, preparation, and a methodical approach, you can handle basic duct cleaning without hiring a professional. This article provides a detailed walkthrough for those interested in learning how to clean air ducts yourself safely and effectively.
Before you begin, it’s helpful to understand the benefits of inspecting your ductwork. For a deeper look into inspection techniques, check out the duct camera inspection benefits for homeowners to ensure your system is ready for cleaning.
Why Consider DIY Duct Cleaning?
Over time, dust, pet hair, pollen, and even mold can accumulate inside your ductwork. These contaminants can circulate throughout your living spaces, aggravating allergies and reducing HVAC efficiency. While professional cleaning is recommended every few years, periodic DIY maintenance can help keep your system running smoothly and your air cleaner between professional visits.
- Improved air quality: Removing debris and dust helps reduce allergens and odors.
- Energy savings: Clean ducts allow your HVAC system to operate more efficiently.
- Extended equipment life: Less buildup means less strain on your system.
Essential Tools and Supplies
Before starting, gather the following items to ensure a thorough and safe cleaning process:
- Vacuum cleaner with a long hose and HEPA filter
- Stiff-bristle brush or a rotary brush attachment
- Microfiber cloths or rags
- Screwdriver (for removing vent covers)
- New furnace filter
- Protective gloves and a dust mask
- Flashlight
For those looking to maximize air cleanliness during and after the process, consider investing in a HEPA air scrubber. This device can help capture fine particles that become airborne during cleaning.
Step-by-Step Instructions for Cleaning Your Ducts
1. Prepare Your Workspace and System
Start by turning off your HVAC system at the thermostat and circuit breaker. This prevents dust from circulating while you work and keeps you safe. Lay down a drop cloth or old sheet around each vent to catch falling debris.
2. Remove and Clean Vent Covers
Use a screwdriver to carefully remove the supply and return vent covers. Wash them with warm, soapy water and let them dry completely before reinstalling. This step helps eliminate surface dust and grime that could re-enter the ducts.

3. Loosen Dust and Debris Inside the Ducts
Shine a flashlight into the duct openings to assess buildup. Use a stiff-bristle brush or rotary brush to gently dislodge dust and debris from the duct walls. Be careful not to damage any internal components or insulation.
4. Vacuum Thoroughly
Insert the vacuum hose as far as possible into the ductwork and move it around to collect loose particles. A vacuum with a HEPA filter is ideal, as it traps fine dust and prevents it from re-entering your home. Repeat this process for each vent opening.
5. Wipe Down Accessible Surfaces
Use a damp microfiber cloth to wipe the inside edges of the ducts and the vent covers. This step removes any remaining residue and helps reduce future buildup.
6. Replace the Furnace Filter
After cleaning, always replace your furnace or HVAC filter with a new one. This step is crucial for maintaining air quality and ensuring your system runs efficiently.
Tips for Effective and Safe DIY Duct Maintenance
- Wear a dust mask and gloves to protect yourself from allergens and debris.
- Do not attempt to clean deep inside the main trunk lines—these areas may require professional equipment.
- If you notice mold, pests, or a strong musty odor, contact a professional for a thorough inspection and cleaning.
- Consider using a duct camera inspection best practices guide to check for hidden issues before and after cleaning.
- Schedule professional cleaning every 3–5 years, or sooner if you have pets, allergies, or recent renovations.
When to Call a Professional
While regular DIY cleaning helps maintain your system, certain situations call for expert attention. If you encounter extensive mold, rodent infestations, or persistent dust problems, a certified technician has the tools and expertise to resolve these issues safely. For more information on advanced inspection methods, explore the duct camera inspection case studies to see how professionals handle complex ductwork challenges.
Additional Resources for Homeowners
For a comprehensive overview of do-it-yourself duct cleaning, you may find this step-by-step guide to DIY duct cleaning helpful. These resources provide more details on tools, safety, and troubleshooting.
Frequently Asked Questions
How often should I clean my air ducts myself?
Basic cleaning of vent covers and accessible duct openings can be done every 6–12 months. Deep cleaning of the entire system is best left to professionals every 3–5 years, or more frequently if you have pets, allergies, or recent home renovations.
Is it safe to use household vacuums for duct cleaning?
Yes, a standard vacuum with a long hose and HEPA filter can remove surface dust and debris from accessible duct areas. However, household vacuums may not reach deep into the main duct lines or remove heavy buildup, which is why professional equipment is sometimes necessary.
What are the signs that my air ducts need professional cleaning?
Warning signs include visible mold growth, persistent dust despite regular cleaning, rodent or insect infestations, and unexplained respiratory issues among household members. If you notice any of these, it’s best to schedule a professional inspection.