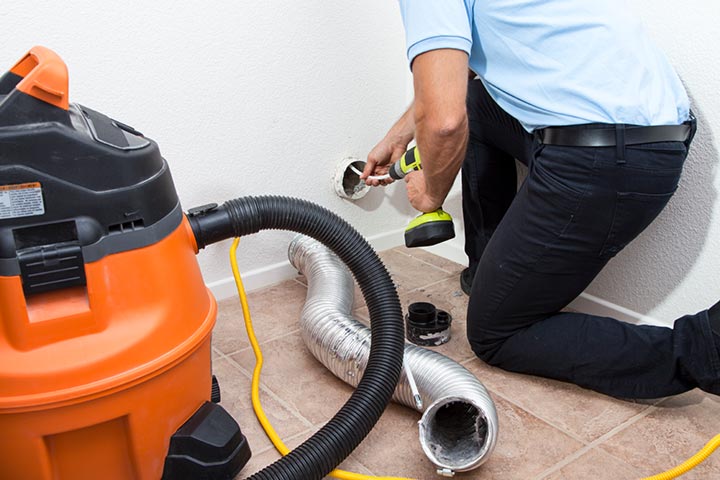
Installing a dryer vent hose is an important task for homeowners and business owners. A properly installed dryer vent hose ensures that your dryer functions efficiently and safely.
Dryer vent hoses help to ventilate the hot and moist air from your dryer out of your home, preventing moisture buildup and potential fire hazards. In this guide, you will learn how to install a dryer vent hose step-by-step, ensuring your home stays safe and your dryer operates at its best.

Why It’s Important to Install a Dryer Vent Hose
Before we dive into the installation process, lets understand why its crucial to have a properly installed dryer vent hose. A dryer vent hose helps to:
- Improve dryer efficiency
- Reduce energy consumption
- Prevent excess humidity and mold in your home
- Lower the risk of dryer fires
Tools and Materials Needed
To properly install your dryer vent hose, you will need the following tools and materials:
- Screwdriver
- Foil tape
- Dryer vent kit
- Measuring tape
- Drill
- Vent hose clamps
Step-by-Step Guide on Installing a Dryer Vent Hose
Step 1: Measure the Distance
Start by measuring the distance between your dryer and the vent outlet. This will help you determine the appropriate length of the dryer vent hose needed for your installation.
Step 2: Prepare the Vent Outlet
Ensure that your vent outlet is clean and free of any obstructions. Use a screwdriver to remove any old vent covers or debris. This step is crucial for ensuring proper airflow.
Step 3: Attach the Vent Hose to the Dryer
Attach one end of the dryer vent hose to the vent outlet on your dryer. Secure it tightly using a vent hose clamp. Make sure the connection is secure to prevent any air leaks.
Step 4: Route the Vent Hose
Route the vent hose from the dryer to the vent outlet. Ensure the hose has no kinks or sharp bends, as this can restrict airflow and reduce the efficiency of your dryer.
Step 5: Secure the Vent Hose to the Vent Outlet
Attach the other end of the vent hose to the vent outlet on your wall. Use a hose clamp to secure it tightly. This step is crucial for ensuring proper ventilation.
Step 6: Seal Any Gaps
Use foil tape to seal any gaps or connections in the vent hose. This helps to prevent air leaks and ensures that the hot, moist air is properly vented out of your home.
Common Mistakes to Avoid
When installing a dryer vent hose, it’s essential to avoid the following common mistakes:
- Using a vent hose that is too long and has many bends
- Not securing the hose tightly to the dryer and vent outlet
- Failing to seal gaps with foil tape
- Not regularly cleaning the vent hose to prevent lint buildup
Maintenance Tips
To maintain your dryer vent hose and ensure optimal performance:
- Inspect and clean the vent hose at least once a year
- Check for any signs of wear and tear on the vent hose and replace if necessary
- Ensure that the vent outlet remains clear of obstructions
Understanding Dryer Vent Hose Types
There are different types of dryer vent hoses available. Understanding their differences can help you choose the right one for your needs:
Aluminum Foil Ducts
Aluminum foil ducts are flexible and easy to install. They are resistant to tearing and can withstand high temperatures. However, they can be prone to damage if not handled properly.
Rigid Metal Ducts
Rigid metal ducts are durable and long-lasting. They provide excellent airflow and are less likely to accumulate lint buildup. However, they require more effort to install due to their inflexibility.
Flexible Plastic Ducts
While flexible plastic ducts are easy to install, they are not recommended for dryer venting due to their susceptibility to tearing and potential fire hazards.
Importance of Professional Installation
While installing a dryer vent hose can be a DIY project, it’s sometimes best to seek professional help. Professionals ensure that the installation is safe and meets all local codes and standards.
When to Call a Professional
Consider calling a professional if:
- You are unsure about the installation process
- You encounter complex venting requirements
- Your vent outlet is in a hard-to-reach location
Final Thoughts
Installing a dryer vent hose is a crucial task that ensures the safety and efficiency of your dryer. By following this step-by-step guide, you’ll be able to install your dryer vent hose correctly and avoid common mistakes.
For maintenance tips and more information on dryer vent s afety, you can visit Consumer Reports.
FAQs
1. How often should I clean my dryer vent hose?
It is recommended to clean your dryer vent hose at least once a year to prevent lint buildup and ensure efficient performance.
2. Can I use a flexible plastic duct for my dryer vent?
It is not recommended to use flexible plastic ducts for dryer venting due to their potential fire hazards. Instead, consider using aluminum foil or rigid metal ducts.
3. What should I do if I notice my dryer takes longer to dry clothes?
If you notice that your dryer is taking longer to dry clothes, it may indicate a clogged dryer vent hose. Inspect and clean the vent hose to ensure proper airflow.